

So you spent hours picking colors, weeks even months hooking and sometimes frogging .. you’ve finally finished. You want to shout it to the world! I’m done.. here’s my new baby!
It deserves the spot light.. it’s going to make your friends drool with envy. You snap a pic and post!

We wrap up the Color Theory series with a lesson on presenting your work to make it shine.
You don’t need a fancy dancy camera or a state of the art, art studio.. believe me! Over the past couple of year I have purchased 2 high tech cameras and both were returned within a month.. now don’t get me wrong, photography is an art but I am a crocheter not a photographer. Unless you plan to take up photography as a profession or a hobby, your regular camera will do. So here are a few tips and trick that won’t break the bank and the result will make your work shine.
Lights, Camera, Action
The first and most important aspect of shooting a great photo is the lighting. It can make or break a photo! I know it’s almost midnight you have hooked furiously to finish and now you want to show your proud achievement to the world .. Stop! Don’t do it! Wait!
Make the most of your natural light. Open up your blinds and let the light shine in. Find a spot in the house that allows the most light in. Believe me I have snapped photos in every room of my house trying to to find the best spot. See the difference! or better yet take it outside when possible
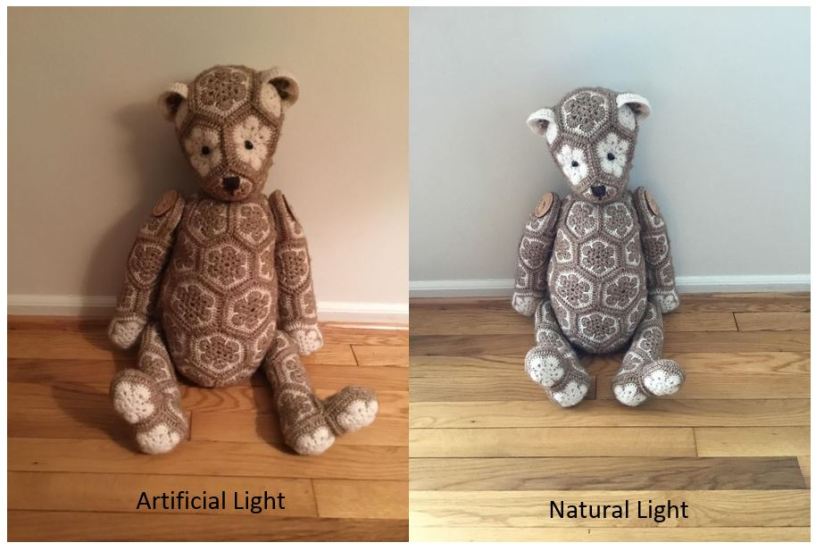
But as winter comes and the days get shorter and gray, natural light isn’t possible. So what now.. then you can adjust the brightness on your camera setting. Doesn’t matter if your using a point and snap camera, camera phone or even your tablet they all come for the basic brightness setting..
Here I have the exact same image all I did was adjust the brightness settings.


Backdrops and Displays
The best back drop for any photo is a plain neutral one. A sheet or a cleared spot on the floor will do.
For those big projects clear a space on the floor, stand on a chair or stool so you get some height and you should be able to get the whole project in the frame, but the stitches can get lost in an aerial view, so always add a close up shot so we can see those beautiful details.


If your project is too big for an aerial view, here’s another way to show case it. My Lilliana was so big, I ended up draping it over a box and taking a picture from the side and did an aerial shot of a small section.


For smaller pieces I use a plain white $1 poster board. If you wanted to add a little color to your background I have recently discovered these scrap-booking sheets for under a dollar at my local craft store, there are hundreds to choose from.


These were take on my white poster board for a background. The white background keeps the focus on the project.


Displaying your work is a good way to show it off in all its glory.
For Scarfs, Shawls and wearable projects, if don’t have a mannequin, no worries.. a hanger will do. Result: I get to see the shawl as it is intended to be worn and how it drapes


Crop it
Cropping is one of the easiest solutions to those unwanted objects in your photo. You don’t want to see my smelly running shoes or the fact that I haven’t cleaned up today 🙂
I used the same photo and just cropped out the edges .
The result: my eyes are drawn to my work and not the mess in the back ground. Plus it brings the squares to the front and center for attention.


Props
You only have to scroll Instagram to see props in full effect. Beautiful pieces of crochet enhanced by a prop or two. You don’t have to go out shopping for props look around your home, from a book to a plate of cookies or a baby toy or a few buttons, all can add charm to any photo. Even a few stitch markers.

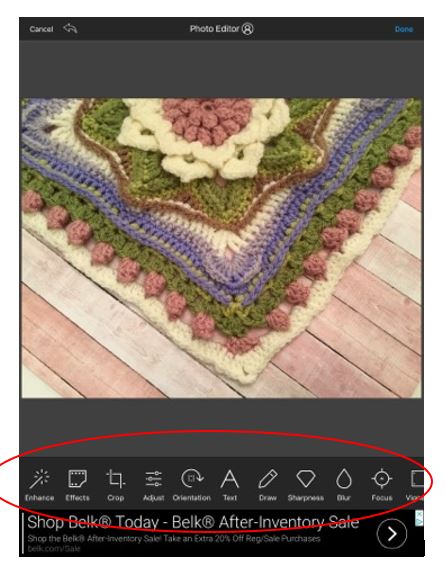
A simple free Photo editor app is all that is needed. They come with so many free features, you can let your inner Warhol out.
 Watermark your masterpiece.
The internet is rife with copyright infringements, pictures are stolen and used for click bait sites. At pippin we encourage you to add your water mark to your photos. A lot of groups don’t allow this as its breaking the “Self Promotion” rule, at Pippin we do not allow links to self promote, but we do encourage watermarking. Don’t let others take credit for your work. A simple way to watermark your work is to add text to your photo using an app.


This is the app i use. https://itunes.apple.com/app/id546821797
All of the above photos were taken with my iPad tablet.. 🙂 Now to this weeks homework assignment. I want you to get creative and snap one finished project in 2 different ways. Use props, lighting and displays. Post both photos to the pinned post over in the club for chance to win this weeks giveaway.
I hope you have come away from my series on Color Theory with a little better insight in to how colors work.
Love Pippin xoxoxox

Will you (please) post a notice when this series is available in a printable format. I have learned so much from these lessons, I would love to have them to refer back to.
LikeLike
I downloaded the app and posted my current WIP on IG
I’ve been trying to learn how to improve my presentation and I thank you for this mini course
LikeLike
whats your IG..
LikeLike
Reblogged this on It's Crochet O'Clock and commented:
The last lesson in Pippin Poppycock’s series on color theory is upon us. Don’t forget to do your homework and get your name into the bag for the drawing. Pippin has been giving away some awesome prizes through out the month!
LikeLike
Thank you for this excellent guideline on how to photograph work
LikeLike
This was very helpful series of lessons. It allmade sense. Thank you so much for doing them.
LikeLike